Liquid Tags
Introduction
Personalizing surveys is a powerful method to increase response rates and provide a great User Experience. With Refiner, it’s easy to personalize the content of your survey questions with the help of so called “Liquid Tags”.
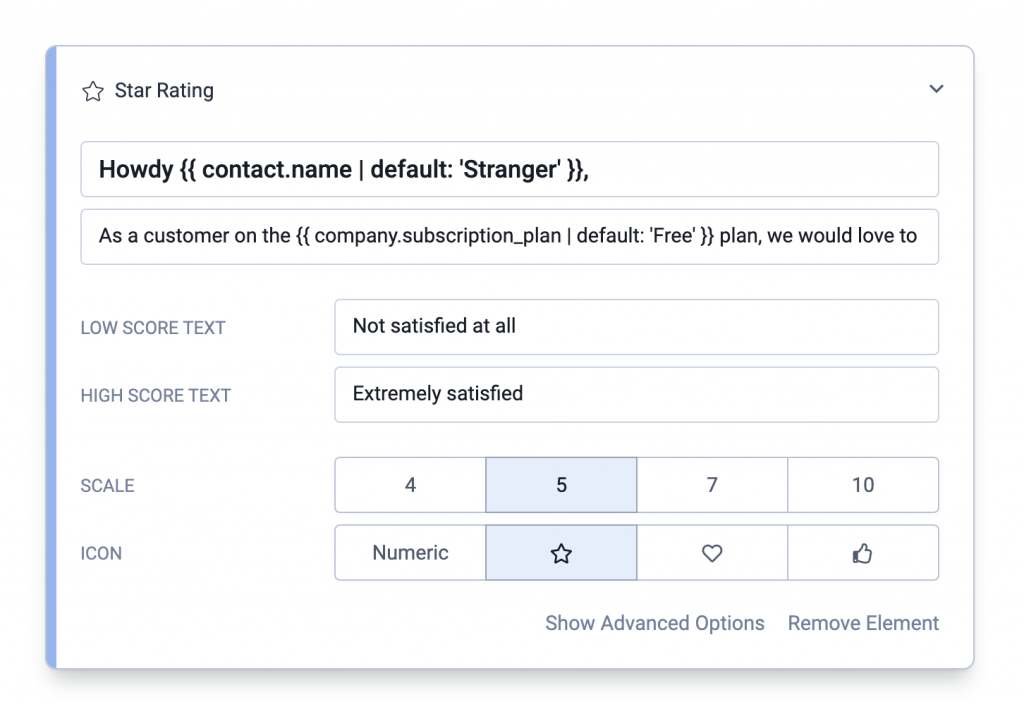
You can add Liquid Tags to the title or description of any question. These tags are then dynamically replaced with user data when the survey is shown.

Importing user data
To use personalization, you need to have user data (e.g. First Name, Company Name, etc.) in your Refiner account to work with. You are free to provide any user data you might need for your survey.
There are multiple ways to send user data to your Refiner account:
- If you are running Web-App Survey campaigns, the easiest way to import user data is to use the “identifyUser” method.
- If you are launching surveys in your Mobile App, you can use the “identifyUser” method of our Mobile SDKs
- If you are sending out Email Surveys, you can personalize the generated HTML Embed Code to include user data.
- If you are using our Survey Pages, you can add user data through URL parameters
- You can also sync user data with backend integrations (e.g. API, Segment, Zapier, etc.)
Add data to survey questions
Once you have user data showing up in your account, you can start personalizing your survey questions and/or the description text of each question.

Liquid Tags can be used in the following survey elements:
- All question headlines
- All question description
- In the URL of a Call-To-Action
The templating language we are using is Liquid which is a simple to use templating engine developed by Shopify. While Liquid offers various complex control elements – such as if/else commands – we recommend keeping the usage of tags light and simple.
Available data fields
As mentioned above, any user data you provided will be available in the Liquid Tag syntax.
All data is stored in any of the two data groups:
- Contact: All user data which you sent to us through an identifyUser call is stored here.
- Account: This object contains data if you are grouping your users into accounts (“companies”, “teams”, etc.). This is a slightly advanced feature and you’ll likely won’t need it.
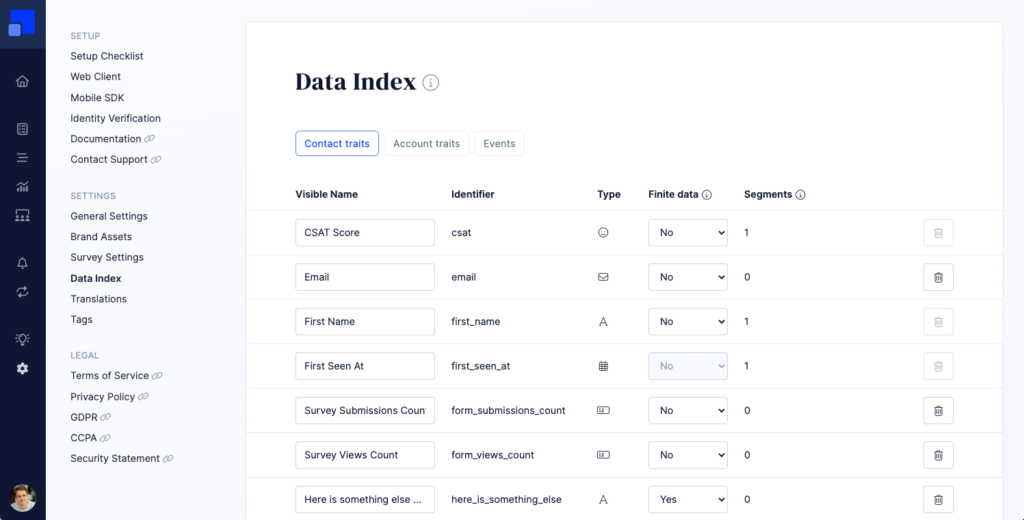
You can find a list of all available data fields in your Refiner dashboard under “Settings > Data Attributes”.

Preview sample data
When editing your survey, you’ll see a live preview on the right side of the screen. The user data taken to render the preview is picked randomly from the currently available user profiles.
If you want to pick a specific user for the preview, you can a contact_remote_id parameter to the URL of the survey editor. You can find the ID of a specific user in the top section of the User Details Panel.
Your URL would then look like this
https://app.refiner.io/projects/<PROJECT_ID>/forms/<SURVEY_ID>?contact_remote_id=<SAMPLE_USER_ID>
Popular examples
Here is a very basic example that adds the name of a user:
Hello {{ contact.first_name }}, good to see you.
If you are not sure if you have a first name on record of all your users, you can use and if/else statement as followed:
{% if contact.first_name %}Good to see you again {{ contact.first_name }}{% else %}Hey stranger!{% endif %}
Another popular option is to define a default value as a fallback:
As a user on the {{ company.subscription | default: 'Free' }} plan, we would like to hear your opinion.
You can also use Liquid Tags in the URL of a Call-to-Action:
https://www.some-url.com?user_id={{ contact.id }}&user_email={{ contact.email }}